Add an Outlook.com to Outlook 2010 or Outlook 2007
Setting up Outlook.com in a specific email client such as the Outlook 2007 or 2010 is no rocket science. It is very simple. All you need is to have ample knowledge of POP3 and SMTP Settings. However, the most common problem faced by people is that incompatibility of IMAP with Outlook.com accounts. As per some of the rumors, Microsoft will sooner or later support IMAP with Outlook.com addresses. Presently, only EAS (Exchange, Active Sync) and POP3 are supported.
In this tutorial, we will focus on how to get your email client functioning while using POP3 and SMTP. For those working on 2013, POP3 should not be used. Use of the EAS is better in this case as it configures the whole thing automatically.
Steps to Add an Outlook.com to Outlook 2010 or Outlook 2007 using POP3 and SMTP:
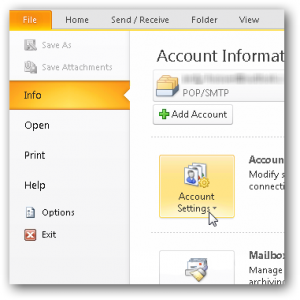
Step 1: Use Outlook 2010 and Click File, Info, Account Settings.
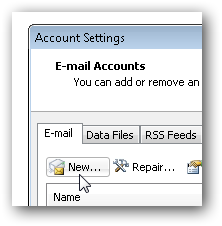
Step 2: Under the tab ‘Email’, Click ‘New’.
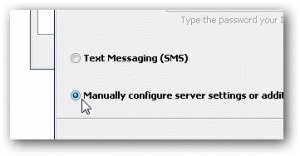
Step 3: Click on the bullet ‘Manually Configure Server’. Now Click ‘Next’.
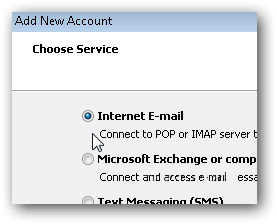
Step 4: Click on the ‘Internet E-mail’ bullet. Now Click ‘Next’ again.
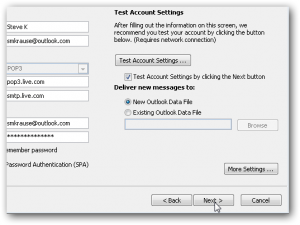
Step 5: Now enter the following details:
– Name
– Email
– Account info
Step 6: Use the following for SMTP and POP3 settings:
Server Addresses:
– SMTP: smtp.live.com
– POP3: pop3.live.com
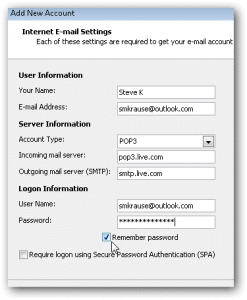
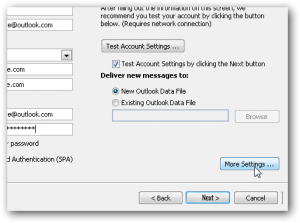
Step 7: After you have filled out all of the information, Click ‘More Settings’.
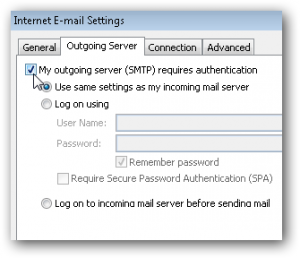
Step 8: Now click the ‘Outgoing Server’ Tab. You need to check the box. This will enable authentication for the ‘SMTP’ server.
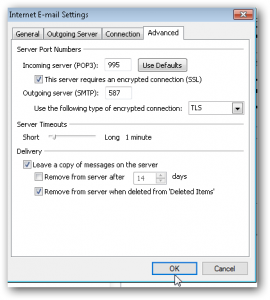
Step 9: Click the Advanced Tab. Now use the Settings mentioned below for the Server Ports and Delivery.
Step 10: Now click ‘OK’ when done.
Server Settings
Incoming server (POP3) – Port 995 and Enable SSL with Check Box
Outgoing Server (SMTP) – Port 587 and Enable TLS with Dropdown
Delivery Settings
It is crucial to note that POP3 is not similar to IMAP where it stores your mailbox in SYNC with the server. The email is downloaded from POP3 from the server. Here, you have the option to delete email as soon as you do this. You may even leave it on the server. Hotmail technical support number experts prefer to leave it on the server until you delete it.
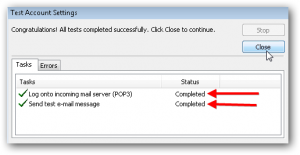
Step 11: Click ‘Next’ on the Main Account menu to test the install. This will finish off the process.
Step 12: Once everything is tested appropriately, you will acquire a ‘Completed’ status. Now click ‘Close’ to finish off the install process. At the end, click ‘Finish’ on the next screen too.